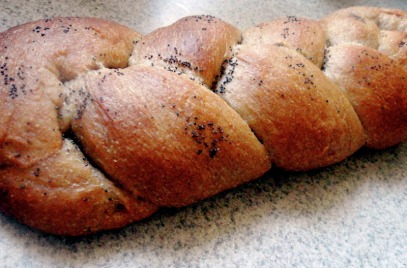
Especially when I make challah bread.
Imagine: Each week, to commemorate the Sabbath, my entire family gathers around our big wooden table and we tear into a giant loaf of challah bread. We share stories about Sabbaths past, about the meaning of various items and recitations. We learn more about our heritage, our faith, and we nourish our bodies with wholesome, meaning-filled food.
The Jewish tradition is rich with meaning and metaphor, and I sometimes wish my family's ancestry could be traced back to such a heritage.
But alas...we are not Jewish and my family seems fairly set in their Protestant ways.
Thankfully though, you don't have to be Jewish to make challah bread. Even better, anyone can break bread with family or friends, everyone can create a space where the bigger questions in life can be acknowledged and discussed.
Click on the link below the picture to read more about making challah and its cultural significance...
The actual term "challah" refers to an ancient Jewish practice. While baking, Jewish women would set apart a small piece of bread, called challah, for the temple priest. After the temple was destroyed, Jewish women began to burn a small piece of dough in remembrance of the temple and the priests that once served.
But challah is not only rich historically, the bread itself is sweet and lightly textured with the addition of several eggs. It pulls apart beautifully and almost melts on your tongue. And I've heard that challah bread makes a killer french toast.
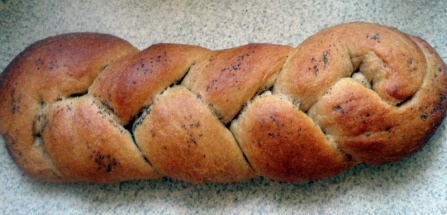
Beautiful to present, challah is far easier to prepare than one might assume. I've included the recipe I used below and a few tips for braiding your bread. I hope that you take this loaf to a gathering of friends and family, a place where you feel safe to share both the bounty of your life and the trials we all inevitably face.
1/2 cup (4 ounces) lukewarm water
6 tablespoons (2 5/8 ounces) vegetable oil
1/4 cup (3 ounces) honey
2 large eggs
2 cups (6 3/4 ounces) whole wheat pastry flour
2 cups (8 1/2 ounces) unbleached bread flour
1 1/2 teaspoons salt
2 1/2 teaspoons instant yeast
1. Combine all of the ingredients in a large bowl. Using a wooden spoon or the paddle attachment on your stand mixer, stir until a shaggy dough forms. Knead, by machine or by hand, for 5-10 minutes or until a soft, smooth dough forms (I had to use more flour...probably an additional 1/2 cup to achieve a smooth dough). Allow the dough to rise, covered for an hour or until almost doubled in size.
2. Line a baking sheet with parchment paper.
3. Deflate your dough and transfer to a lightly floured work surface. Divide it into three equal pieces, shape each piece into a rough log, cover the pieces, and allow them to rest for 10 minutes.
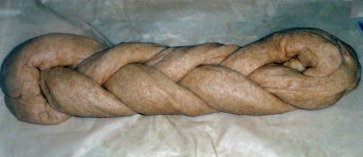
4. Roll each piece of dough into an 18-inch rope. Place the three pieces of dough side by side on the prepared pan, and braid them, squeezing the ends together, then tucking them neatly underneath. Cover the braid gently with lightly greased plastic wrap or a damp towel and allow it to rise for about 1 hour. Near the end of the bread’s rise, preheat the oven to 375°F.
5. Bake your bread for 20 minutes, and then tent with foil and bake for an additional 10 minutes or until your braid reaches a deep, golden brown. Remove your loaf from the oven and allow to cool to lukewarm before taking your first slice.
Always,
Monet
Anecdotes and Apple Cores


 RSS Feed

